Garden Levelling Costs & Free Quotes
Last Updated on By Jon
In this 2025 guide, we'll be discussing the cost of levelling a garden as well as other important factors that may affect it. Let's take a look at what needs to be done and how much it will cost.

Average garden levelling costs
Here are some typical prices to level an average UK garden:
| Stump Diameter | Front Garden | Rear Garden |
|---|---|---|
| 10" / 25.4cm | £0.00 | £0.00 |
| 15" / 38.1cm | £0.00 | £0.00 |
| 20" / 50.8cm | £0.00 | £0.00 |
| 25" / 63.5cm | £0.00 | £0.00 |
| 30" / 76.2cm | £0.00 | £0.00 |
(Prices taken from multiple sources and averaged) Prices Checked // |
||
Tree Stump Removal Cost Calculator
The Average Cost of Removing a Tree Stump
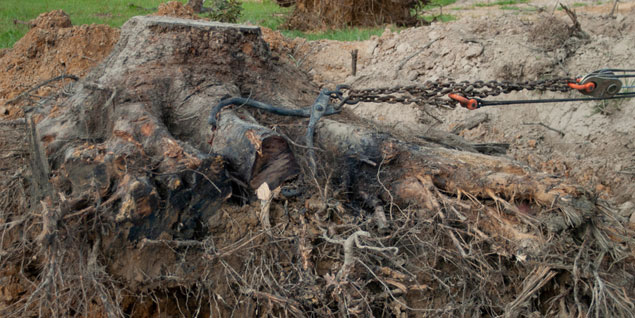
Regardless of a tree stump's dimensions, removal can be accomplished by either digging it out or grinding it out. Cost will vary depending on the chosen method, how large the stump is, and how accessible the location is.
Stump removal cost often varies depending on the stump's dimensions. The starting price is £30. Pricing generally works like so:
Front garden tree stump removal: £0.00 for each inch
Back garden tree stump removal: £0.00 for each inch
Get Free Garden Levelling Quotes OnlineFactors Affecting the Cost of Levelling a Garden
Size of your plot
The size of a garden will have an impact on the cost of levelling it. Generally, larger gardens require more material to level and therefore would incur higher costs for materials, labour and equipment hire. Additionally, if there is vegetation in the area that needs to be removed or landscaping elements such as retaining walls that need to be constructed before any levelling can take place this could add additional costs which are dependent upon the size of your garden.
Overall gradient
A steeply sloped or hilly area will require more time, labour and materials to level than an even grade. The steeper the slope is, the higher costs are likely to be for additional soil fill material, excavation work and specialised equipment such as bulldozers that may need to be brought in if manual methods aren't feasible. Additionally, any retaining structures required will add further expense depending on their size and complexity.
Retaining walls and terracing
A retaining wall or terraces will be constructed in order to secure the tiers. These walls and terraces can either be made of concrete, brick, breeze blocks, timber or railway sleepers depending on how deep they need to go.
Site accessibility
The task of gardening can be made more difficult in certain cases, especially when large pieces of equipment like diggers or soil compactors are necessary. Furthermore, the presence of trees, stones, bushes and other structures pose an even greater challenge.
Garden steps
Staircases are typically necessary for more steep terrace gardens, whereas a sloped path can be used to access slightly less severe ones.
Patios and decking removal/replacement
The cost of levelling a garden with patios or decking will depend on the size and complexity of the project. Generally, it is more expensive to level a garden that has existing patios or decks than one without these features due to additional excavation and installation costs associated with them. The extra labour involved in removing an old patio/deck structure, preparing the area for new installations (including drainage), sourcing materials such as pavers/tiles or timber boards, laying them all out correctly according to design specifications etc can add considerable time onto projects which increases total labour-costs significantly.
Infill amount and type
The fill is typically a combination of dirt and topsoil. If feasible, the fill could be dug up from another area in the garden; otherwise, there would be an additional fee for it.
Disposal of waste
Depending on how much and what type of waste needs to be removed, it could add hundreds or even thousands to the total project cost. This is because disposing solid wastes such as rocks and soil often requires special permits or arrangements with local authorities that can increase costs considerably. Additionally, if hazardous materials are present in the debris then more expensive disposal methods may need to be employed due to safety concerns which will also drive up costs further.
Why Level a Garden?
Better aesthetics
There’s no denying that having an even looking layer over which everything else is built upon looks neat and tidy compared to random bumps-and-valleys; plus if there were ever plans made about installing features such as ponds/waterfalls then these become less daunting tasks due their newfound accessibility once levelled correctly beforehand.
Easy maintenance
Maintaining a level garden is generally easier than maintaining a sloped garden. Slopes can be difficult to mow and aerate, as well as challenging when it comes to proper drainage and soil erosion control. Level gardens are also simpler to irrigate since water can flow evenly across the entire area instead of having trouble draining on an incline or running off quickly at the bottom of slopes.
Improved access
A level surface will make it much easier for you to move around your garden freely with ease - whether that’s pushing a lawnmower across grass, wheeling out furniture during parties or simply strolling through flowerbeds on summer evenings!
Easier to landscape
By levelling off an uneven terrain in your outdoor space, it makes designing and creating new areas within the landscape far simpler than before – especially when working with raised beds filled with plants requiring various levels of sunlight exposure throughout the day like vegetables do!
Improved drainage
- Reduced erosion: With a level garden, the soil does not shift or move due to gravity and is less prone to eroding away with heavy rainwater runoff.
- Improved water retention: A level garden allows for better collection of rainfall as it can be distributed evenly across the entire area instead of running off quickly in one direction on sloped surfaces like hillsides or uneven terrain. This also helps reduce flooding risk by allowing more time for ground absorption before excess water overflows onto roads and other areas nearby that could cause damage from rapid run-off accumulation during storms.
- Enhanced aeration: Level gardens promote proper aeration since their uniform surface makes it easier for oxygenated air molecules (from both belowground and above) to reach plant roots without obstruction caused by an uneven topography; this encourages healthy root growth which enables plants’ ability absorb nutrients necessary for survival & thriving healthily over time!
Better ground stability
Gardens that are unbalanced and have an incline are prone to changes in the terrain. Gravity's pull is a factor for any grade, which can result in deterioration or sinking of the ground over time. This issue is especially problematic when people's homes occupy this same area; sloping gardens become even more vulnerable with elements like rainfall intensifying soil movement.
Reduced Risk of Slips, Trips and Falls
A level garden is safer than a sloped one because it eliminates the risk of slips, trips and falls due to uneven ground or steep inclines.
Adding value to your property
Levelling a garden can add value to your home in several ways.
Firstly, it creates more usable outdoor space which is attractive to potential buyers as they are able to envision the possibilities of what could be done with that extra area.
Secondly, levelled gardens look much neater and tidier than uneven or sloping ones making them far more appealing aesthetically both from inside and outside the house – something people often take into account when viewing properties for sale.
Finally, if there is sufficient space available after levelling then this opens up opportunities for creating areas such as patios or lawns where furniture can be placed meaning these spaces become useful extensions of living rooms and other indoor spaces increasing their overall appeal further still.
How level should it be?
A level garden should not be totally flat because it can lead to water pooling in certain areas, which can cause drainage problems and provide a breeding ground for mosquitoes. Additionally, an overly-flat landscape lacks texture and interest visually. A slight dip or hill will create interesting gradients that give more dimension to the space while still remaining level overall.
How to work out your garden gradient.
It's a simple process to work out (and mark out) your garden gradient:
- Using a measuring tape or ruler, measure the height and width of your garden area to determine its size.
- Calculate the rise (difference in elevation) between two points on either side of your garden by subtracting one from the other – this is usually done at each corner for accuracy.
- Divide the difference in elevation you calculated by the length/width determined earlier; this will give you an average gradient that can be expressed as a percentage – e.g., 4% slope = 1m vertical drop over 25m horizontal run.
- Mark out any areas where there are changes in grade using wooden stakes so they’re visible when planning how much soil needs to be moved around during digging work later on.
- Place level boards across sections of ground with different gradients, then use spirit levels placed along them to check whether these slopes need adjusting before planting begins - if necessary make adjustments accordingly until desired results are achieved.
Levelling a bumpy lawn (that is already pretty level)
Perhaps you don't need any major flattening work undertaken? When your lawn has slight dips/rises or bumps then the process is far more simple. Here's a step-by-step guide:
- Assess the lawn to determine the degree of unevenness and decide on a strategy for leveling it out.
- Mark any existing bumps, depressions or other irregularities with stakes so you know which areas need attention when working on them later.
- Rake over the entire area to remove debris such as stones, sticks and leaves that might be blocking your view of all potential problems spots; use an adjustable metal rake if necessary in order to reach deeper levels below ground surface level where needed during this process (this is important for ensuring proper levelling).
- Topdress low points by adding soil from elsewhere – either bagged topsoil or compost can work depending on what type of grass you have – using a shovel or trowel until they are evened out with higher elevations near them while also taking care not to overload these sections too heavily; water regularly after this step has been completed successfully in order ensure sufficient nutrient uptake by plants growing there afterwards!
- Add more soil/compost onto high points throughout lawn and spread evenly across their surfaces before gently raking down excess material into lower-lying patches nearby -– again being careful not avoid excessive pressure here since this could cause further damage instead.
- Roll over affected area(s) several times using roller filled halfway up its height capacity each pass until desired results achieved then harrow lightly afterward one final time just enough eliminate remaining small ridges left behind (if any) once everything else equalized properly beforehand
The Garden Levelling Process Explained
Though it's not a hugely complicated project to undertake, there is a lot of work involved and it makes sense to carry out each step in the correct order. Here is a step-by-step guide:
1) Clear away debris, weeds, rocks and other obstructions from the area you wish to level. This will make it easier for you to work with later on in the project.
2) Measure out how much soil needs to be added or taken away from each spot by using small stakes as markers along edges of garden beds and/or paths if they exist already; these points can also serve as reference when leveling off areas within them, allowing more control over depth adjustments based upon need (elevation). Make sure all measurements are consistent across different sections so there's no unevenness when finished levelling!
3) Prior to filling in the sloping ground of your garden, it is essential to excavate a foundation for the retaining wall if one is required. This trench must be created for proper drainage if the grade slopes inwardly. The purpose of building this wall is so that it can contain and facilitate levelling out the terrain.
4) Add fill dirt where needed - this should be done gradually so that its spread evenly throughout before compaction begins; use tools like shovels & rakes until desired elevation levels have been reached at every point marked earlier (needed heights here may vary depending on what type of landscaping features will eventually take shape).
5) Compacting – now comes time for compacting down newly laid soil into place via heavy duty equipment like tamping machines; ensure topsoil layers don’t get mixed up during process since lumpiness could lead problems later once plants start growing again after being planted back in their positions following completion!! Also note whether additional amendments such ash compost might help improve quality further.
6) Finished product check - inspect entire worked area one final time post compaction just making sure everything looks uniformed + no irregularities were left behind anywhere else either due lackadaisical attention paid previously… If happy then begin planting flowers and vegetables right away (if not satisfied repeat steps 1 through 4 above!)
Important Considerations
Drainage
If the land tends towards wetness, especially if it's located within a valley or area with high precipitation levels, consider installing proper drainage systems as part of your project works. This will help direct excessive water away from newly levelled terrain and reduce pressure on retaining walls while also making sure that your new garden can be used optimally for whatever you have planned out.
Services
It is important to check for any underground cables or pipeworks before beginning a project in order to avoid disruption of mains services. A contractor should do this as part of the site inspection prior to giving an estimate.
Tree roots
Roots are a common culprit of shifts in garden levels as they grow larger and wider over time. This expansion can create bumps, divots, and higher ground. To remedy this issue you should bring in topsoil to even out the terrain; however caution must be taken so that no part of the tree trunk is buried which could potentially cause rotting or death of the tree. Additionally care must also be taken not to alter moisture content by changing level too drastically.
Frequently Asked Questions
What can I use as a retaining wall?
There are a variety of materials that can be used to construct garden retaining walls, including concrete blocks or bricks, natural stones such as granite and limestone, timber sleepers (treated wood), interlocking concrete blocks/pavers/gabions filled with rock or soil. You may also consider building your wall from recycled materials like old railway ties for an eco-friendly option. Ultimately the choice is yours depending on factors such as budget and aesthetics - whatever material you choose make sure it's strong enough to support the load of soil behind it!
What are 'weep holes' in my retaining wall?
Weep holes in retaining walls are small openings along the base of a wall that allow water to drain out. They are typically placed at regular intervals and help prevent moisture from building up behind the wall, which can cause damage or erosion due to excessive pressure. Weep holes also provide an outlet for any groundwater that may have seeped into the soil surrounding the wall.
My garden is too steep, what are my options?
You could try to level out the slope by creating terraces or using a retaining wall. You can also build stairs in the slope, so that it is easier to navigate up and down. Additionally, planting groundcovers on the slope will help with erosion control as well as making it look nicer.
Is planning permission necessary to level a UK garden?
In the UK, planning permission is usually not necessary to level a garden. However, there are some exceptions that may require it depending on where you live and what type of work needs to be done in order for your garden levelling project to take place. If you plan on doing any major structural alterations such as moving walls or adding an extension then it would likely need approval from the local council. It’s best to check with them before starting work so that no rules are broken and avoid potential fines down the line if they deem something wasn't compliant with regulations after completion.
Is the Party Wall Act relevant to levelling a garden?
The Party Wall Act 1996 is relevant to levelling a garden if the works involve any construction that affects an existing party wall, or building work within 3 metres of a neighbouring property. The Act requires notice to be served on neighbours who may be affected by such work and provides protection for both parties in terms of rights and responsibilities during the course of carrying out works. It also allows agreement between adjoining owners as to what can or cannot take place when it comes to altering boundaries/party walls etc., which could include levelling gardens where they are shared with another property owner.
What machinery is needed?
The most common machinery used to level a steep garden is a mini-excavator, which is typically outfitted with specialised attachments such as buckets, rippers and grading blades. Smaller jobs may be achived with more traditional tools such as spades, shovels and wheelbarrows (and a lot of hard work!).
Compare Garden Landscapers Now