Patio Repointing Costs, Calculator & Free Quotes
Last Updated on By Jon
With such seasonal use UK patios are often neglected during the colder months. The inclement British weather can take its toll on your patio grouting causing it to crack. Not only is this unsightly but can be a trip hazard and lead to further damage to your patio area.
Our free guide to repointing a patio will show you all you need to know including dry mix, brush-in compounds and average patio repointing costs for 2024.

Average patio repointing costs
Want some average prices to repoint your patio? Take a look below:
| Job | Average Cost |
|---|---|
| Repointing (sqm) | £15.45 |
| Crack Repairs (sqm) | £13.39 |
| Brush-in Compound (20kg tub) | £36.05 |
| Average-sized patio | £257.50 |
(Prices taken from multiple sources and averaged) Prices Checked 26/07/2024 |
|
Patio Repointing Cost Calculator
Factors affecting the cost of repointing a patio
There are of course several factors that will influence the overall cost of your project, we've detailed the most influential below:
- Size of patio: perhaps the most obvious factor... if you have small patio the cost will be less compared to repointing a large patio area.
- Type of patio: Whether natural stone, slabs or bricks etc. the size of slab will affect how much pointing is needed. Large slabs will require less pointing than smaller-sized stones.
- Type of pointing used: It's more expensive to use a modern brush-in compound when it comes to material costs, however the application process is far faster which can drastically reduce labour costs.
- Preparation: If you're looking to save money then the prep work of chiselling out your existing pointing can be done by yourself quite easily, and with quite basic tools.
How to repoint a patio - Step-by-step
Tools needed
If you're undertaking this as a DIY project there are a few tools necessary to ensure the process goes as smoothly as possible:
- Plugging chisel - designed for removing old mortar from brickwork they can be used equally well with patio mortar.
- Lump hammer - a manageable one-handed, short-handled solid hammer for striking the chisel.
- Bolster chisel - needed to break up existing mortar when looking to replace all mortar not just patches.
- Stiff brush - needed for debris removal and for sweeping in dry compound if that's your chosen approach.
- Pointing trowel - if using a sand and cement mix a pointing trowel is needed to bed the mortar.
- Hosepipe - clean-up is an important part of the process to avoid compound staining the patio slabs/stones.
- Patio pointing mix - Whether sand and cement or a brush-in compound you'll need this to finish the job!
1. Preparation
Perhaps the most important and time-consuming part of the whole process there is no avoiding the fact that this step is hard work.
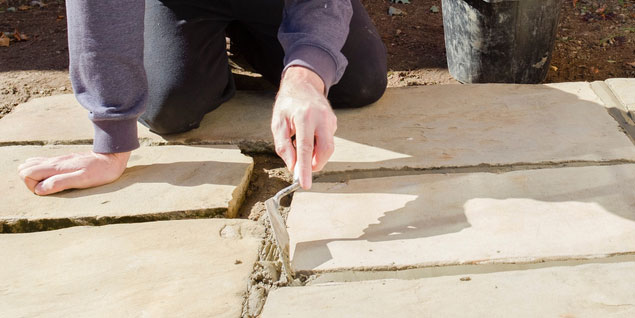
Using a combination of your lump hammer and bolster chisel to loosen larger sections of mortar, and the smaller more precise plugging chisel to remove the debris you can clear out the joints.
If the original pointing is particularly difficult to remove, you can use a small angle grinder to make accurate incisions. This however comes at the risk of damaging your patio slabs/stones so is probably best left to professionals that work with such tools daily.
2. Cleaning
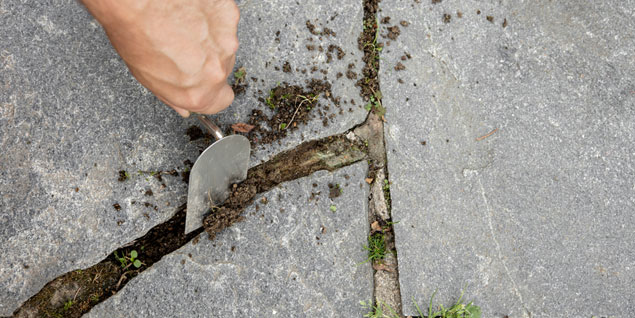
After the chisel work there is bound to be a large amount of smaller debris at the base of your joints which will need to be cleared out. You can use a combination of techniques to clear them out completely including a stiff patio brush, power washer, leaf blower and a standard garden hose. Once you're confident the lines are clear then wet the entire area and move on to the next step.
3. Adding the mortar/pointing compound
There are two main options when it comes to repointing your patio as explained below:
Brush-in compound
Certainly, the most convenient way to repoint a patio, brush-in compounds are perhaps the most popular DIY approach as they are incredibly easy to apply, durable and leave a great finish.
- Saturate your patio: Soaking your patio first has a number of benefits such as allowing the compound to adhere deep into the gaps and preventing compound from sticking immediately to the surface to prevent any overrun or staining of the slabs.
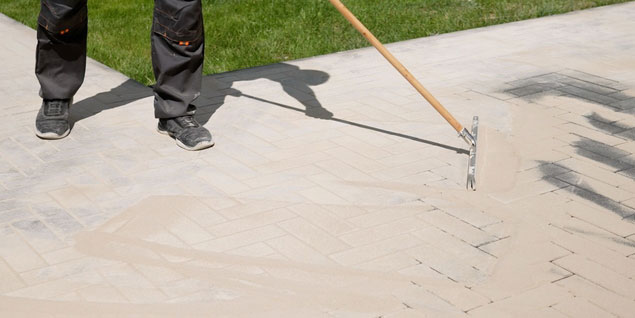
- Pour the compound: Pour out the dry granule mix from the supplied bucket and begin sweeping across the patio and into the joints. Though an easy process it's worth taking your time to ensure each joint is filled and level with the slab surface to ensure maximum longevity of the joint. Some choose to compress the joints with a pointing trowel to be sure, but this is not normally necessary. Keeping the surface re-wetted at this point will only help the process preventing the compound from setting to early.
- Remove excess: Once you're happy all your joints are filled you can lightly brish away any residual compound that has gathered on the surface. Many dry brush-in compounds can be re-used so can be kept in the original container submerged in water.
- Leave to set Depending on your chosen manufacturer of compound you simply have to wait the allocated time for the pointing to set before you can confidently walk on it. You will typically spend 48-72 hours avoiding the lines to be sure.
Brush-in liquid compound
Similar in process to the granule compound above, this comes in bucketed liquid form in various colours and follows the same application process. The only noticeable change in the technique is that once poured into the gaps and brushed into place, additional water will be needed to clear the slab surface completely of the liquid compound.
Both ready-mixed pour in approaches are incredibly convenient, easy to DIY however can be costly per bucket needed.
Dry sand and cement compound
A more traditional method that comes with additional risks of staining if not carried out properly but can still be achieved as a DIY project.
- Ensure your patio is dry: Crucially important to this technique to is ensure your patio is fully dry both on the surface and in the joints (which is why this technique is often practiced in the summer months). This is vital to ensure the sand and cement mix doesn't stain your patio slabs.
- Mix the mortar: A 3:1 mix of sand:cement is typically used and mixed completely dry without the addition of any water at all. Once a uniform colour is achieved the mix is ready. An advantage if this approach is that you can mix smaller amounts for repair work without having to open full tubs of ready-mixed compound.
- Fill the joints: Scattering the compound over the joints and lightly brushing into place is the next step. As both elements are dry, it should sweep easily and fall into joints without clinging or staining. Use a pointing trowel to compress the joints fully (the lightweight mix doesn't always compress sufficiently which can lead to cracking in the future).
- Clean the area: To finish simply use a soft brush to gently sweep any excess from the area and dispose of accordingly. Any residue left at this stage will likely cause staining to your slab surface so this is a very important yet simple step.
Optional: At this stage you can leave your newly grouted patio to slowly set, however there is an optional step taken by some which is to lightly mist the patio with a fine hose spray taking care not to dislodge any of the dry mix. This has the benefit of gently washing any residue into the filled lines and helping the cement to cure faster. Care must be taken however to ensure you don't wash away any mix or cause additional staining.
Get Free Patio Repointing Quotes OnlineSmall patio gap repairs
You may not need to repoint your entire patio, and it's entirely plausible to carry out some minor repairs. The process is essentially the same, but on a far smaller scale:
- First remove any loose debris around the gap using a hammer and chisel.
- Clean the area with a brush and or hose to leave a clean work area.
- Apply your chosen compound using the steps above taking care to match the existing type if looking for a seamless repair.
![repairing cracked patio grouting]()
Repointing natural stone paving
If you need to repoint stone paving other than common regular shaped sandstone flagstones, then it may be easier to use a more traditional hand-pointed approach.
You may find that brush in compounds don't work as well with uneven stones.
In this case you can make a 3:1 sand to Portland cement mix and add water until a smooth consistency is achieved. Taking great care to avoid overspill onto the stones (to avoid staining) the mix can be carefully applied with a pointing trowel or for greater precision a grouting bag and nozzle can be used to 'pipe' in the mixture.
Should I use sharp sand or building sand?
Though it is entirely possible to use sharp sand in your pointing mix, the resulting texture will be far coarser in both texture and appearance. You may also find that it is more susceptible to frost damage and general weathering.
![free patio repointing quotes online]()
How long will my new pointing last?
Once pointed correctly, your new pointing should last well over 10 years before needing any form of attention other than cleaning. If for any reason it shows any sign of failing before then it is likely that it wasn't installed correctly and may need the attention of a professional.
What causes pointing to crack?
There are a number of common reasona as to why pointing can fail:
- Depth: if the mortar mix wasn't pushed or swept in to a sufficient depth then it won't be structurally strong enough to last long before cracks appear.
- Unstable base: if the patio was laid on a sand base it could be unstable and cause slight movements which can cause the pointing to craze.
- Loose slabs: incorrectly laid slabs can move and open up gaps. This in turn lets rain in which can freeze and expand causing cracking issues.
- Existing fault: if you have an existing fissure from either incorrect installation or physical damage then rainwater will find a way in causing further damage.

