Brickwork Repointing Costs & Free Quotes
Last Updated on November 16, 2020 By Jon
As you may know, bricks and mortar when combined create sturdy foundations for any building work.
Pointing is the application of mortar to bricks during the building process. It is done to firmly hold the bricks together and to prevent water seeping inside a home. It's the straight lines you can see inbetween each individual brick (typically 10-15mm thick on standard brick walls).
But because mortar generally doesn't last as long as brickwork, it can require some maintenance in order to keep it functioning perfectly. This is where professional repointing comes in the picture to give your wall a new leas of life and to preserve the overall integrity of the structure once more.
Get Free Brick Pointing Quotes Online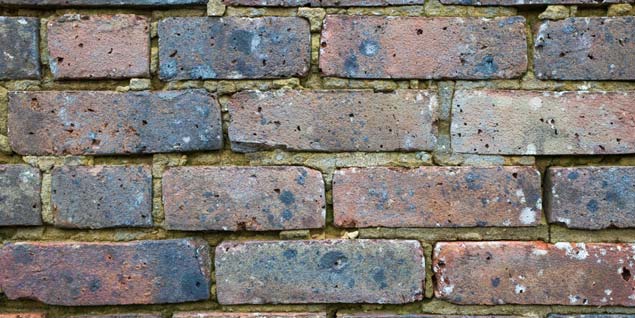
Repointing Benefits
There are more than enough advantages to benefit from repointing brickwork. The following are some of them:
Improved Aesthetics
Repointing your home enhances its exterior aesthetics and can rejuvenate a home. Not only for vanity, but repointing your home can also increase its value to potential buyers or investors.
Conservation of Old Properties
With a proper repointing job, historic properties with expired brickwork can be conserved. Additionally, such properties can also benefit from a rejuvenated look as well as reduced maintenance costs.
Increased Durability
Repointing can also improve your wall’s durability and guard it against adverse weather conditions. Generally, repointing can help you avoid significant damage to your home’s structural foundation that is brought about by adverse weather. Therefore, it needs to be done correctly. If not applied correctly, or an inconsistent mix used it could lead to further problems down the line.
When Should You Repoint a Wall?
As explained earlier, brick-built homes will require a repointing job after sometime. And although it may appear trivial to some, pointing your home is a highly essential activity. Mortar makes up a significant percentage of the wall and is as vital in the construction as the bricks themselves.
Moreover, the mortar is primarily designed to prevent penetrating damp and water ingress. Besides holding the bricks together, mortar also helps to smooth out any irregularities on the brick’s edges. As it's softer than the surrounding brick, the mortar will inevitably start showing ageing signs as a result of weathering. Note that it’s designed to happen that way and is entirely planned since the mortar weathers in place of the bricks. As a result, the wall will need a repointing job after sometime, but this is considered far more acceptable than having to fix the bricks themselves.
Efflorescence
The appearance of efflorescence that’s caused by rising damp is also another indication that your exterior walls need a serious repointing job. In chemistry, efflorescence is the migration of a salt to the surface of a porous material, where it forms a coating. The essential process involves the dissolving of an internally held salt in water, or occasionally in another solvent.
It doesn't cause any permanent damage to your wall structure or brickwork, however it does look unsightly and can be remedied with some new repointing work.
The Process of Repointing Brickwork
Cleaning
The job of repointing brickwork first involves thoroughly cleaning the wall to get a good clean surface on which to begin. Once clean, any problem areas can be easily identified for application.
Removal
The next step is to clear the old mortar, some of which will have fallen off during the cleaning process. The rest can be manually cleared starting fro the top and working your way down.
Mixing
Enssuring the consistency of your new mortar mix is a vital, and often overlooked step. Following the instructions and measurements is key. Making sure enough 'muck' is mixed and that it's at the right consistency is crucial.
Wetting
Dry walls can draw moisture away from mortar, which will cause drying and cracking. Therefore, first dampen the wall with a water spray before applying the new mortar.
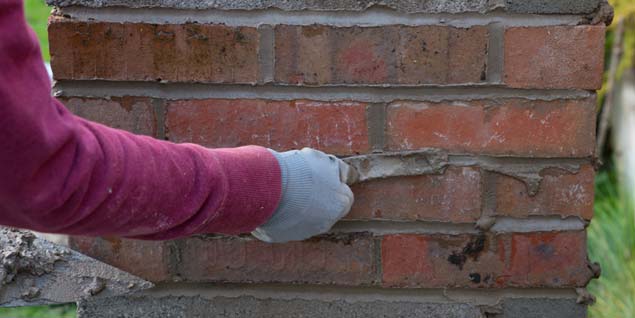
Application
Now to begin the repointing process... which involves packing the joints tightly with a decent volume of mortar. It's important to push the mortar in in order to force any air bubbles out to the surface and not to apply too much in one go before smoothing the finish.
The most popular joint profiles are:
- Flush
- Bucket handle
- Weather struck
- Recessed
- Raked
The Cost of Repointing Brickwork
There are numerous factors which will in turn affect the overall cost of repointing your walls.
Area
As expected, the size of the area needing work will have a direct impact on the overall price. Work will take longer, and more materials will be used in the process driving up the price.
Condition
how bad is the existing mortar? Does it all need to be removed, or just a portion? Also, how big is the blockwork? It might be that you can carry out some of the preparatory work yourself if hiring professionals to reduce the overall cost.
Access
Depending on the size, shape and height of the wall needing pointing work, you may need to erect scaffolding for safe working at height. This might add as much as £100 to £800 to the job. You can read our guide to scaffolding costs to get a better idea.
DIY
If you're confident enough to tackle this job yourself then there are significant savings to be made (if you count your labout as free of course!). Materials might oly cost you £200 - £300 for the entire job plus any additional expenses such as scaffolding hire.
The following is a summary of how much it can cost to repoint brickwork when hiring professionals:
| Job | Cost | Duration |
|---|---|---|
| Wall repointing per m2 | £30 - £55 | ongoing |
| Chimney repointing | £350 - £900 | 1-3 days |
| Semi-detached house repointing | £2,300 - £3,200 | 10-14 days |
| Terraced house repointing | £3,150 - £4200 | 14-21 days |
How to Repoint a wall yourself
Wondering how to repoint brickwork? The following is a step-by-step guide to help you do it.
What you’ll need:
- Water for both cleaning the wall and wetting it before application
- Small Chisel, Screwdriver and a Hammer – to remove the old crumbling mortar
- Soft and Wired Brushes – for cleaning out the spaces between brickwork
- Portland Cement or Lime Mortar – you can purchase this pre-mixed for small aounts or mix it yourself for larger applications
- Trowel and Mortarboard – to hold and apply mortar without mess
DIY Repointing Process
- Ensure that the wall space is clear from debris, dust, and obstructions before laying down the mortar. And to prevent damaging the pathway or plants, plastic sheets should also be laid down.
- Now using the chisel/screwdriver and a hammer, you can remove the existing pointing. Optimal care should be observed when chipping away the existing pointing material. This is especially around your windows and doors, since this can affect their opening and closing mechanisms and stray pieces of flying material can scratch or even break panes of glass.
- The only thing that should be visible after all the old pointing is removed should be the wall’s edge. That’s the space needed to replace and lay down the mortar, and it should be dusted off first before applying the mortar.
- For the color to be consistent, the mortar will need to be evenly mixed. That action comprises of white cement, lime mortar, and building sand. Afterward, applying the mortar is the next step that follows. Of course, if you've opted for pre-mix then this process becomes a lot easier and achieving a consistent mix is simple.
- It should be applied firmly by pushing it from top to bottom and right to left – and left to dry before adding 2-3 more courses. Once completely dry, the mortar can then be applied to the vertical joints and given several hours to dry.
- Finally, the wire brush can be used to safely remove the excess material and ensure that pointing is evenly spread. Note that this should only be done once everything has completely dried up.
How to Repoint Old Properties
For older properties, traditional Lime Mortar is more effective in the repointing job compared to a Portland Cement mortar. That’s because the latter seals moisture into the building, while the former allows it to adequately breathe.
If your property was built before the 1930s, it would be best to use lime mortar instead of Portland Cement. This will help you avoid getting cracks and any other structural damage. It’s also water permeable. On the other hand, lime mortar is highly flexible, adaptable to damages, and very eco-friendly.
Compare Rendering Costs Now